Demo
You can see an example in this test blog
To create this effect on images
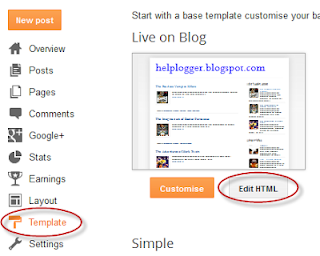
Login to your Blogger account, go to Template and click the Edit HTML button:
Click anywhere inside the template's code and press the CTRL + F keys to search for this tag:
</head>Just before </head> paste the following scripts:
<script src='http://code.jquery.com/jquery-latest.js' type='text/javascript'/>Note: If you already have jquery, please remove the code in red.
<script src='http://helplogger.googlecode.com/svn/trunk/jquery.easydrag.js' type='text/javascript'/>
Now when you want to drag an image, use this code inside the HTML of your post or of your page:
<img id="easydrag1" src="image-URL" style="border: 0px none; cursor: move;" />Change the URL of the image where is indicated, and furthermore, it is important that each image has a unique ID, in this example the ID is called easeydrag1, that ID must be twice.
<script type="text/javascript">
$(function(){ $("#easydrag1").easydrag();});
</script>
If you have another picture with this effect, then you should put a different image with other ID, for example easydrag2, otherwise it will not work:
<img id="easydrag1" src="image-URL" style="border: 0px none; cursor: move;" />And how do you do if you want to put a link to the image?
<script type="text/javascript">
<img id="easydrag2" src="image-URL" style="border: 0px none; cursor: move;" />
<script type="text/javascript">
$(function(){ $("#easydrag1").easydrag();});
$(function(){ $("#easydrag2").easydrag();});
</script>
We will set one Javascript function, so that when we will double click on it to open the page we want.
In this case, the code you would use, would be this:
<img id="easydrag1" style="cursor:move; border:0px;" ondblClick="javascript:window.open('link-URL')" src="image-URL" /><script type="text/javascript">With this the picture can be without any problems dragged around and can be activated by double clicking on its link.
$(function(){ $("#easydrag1").easydrag();});
</script>


EmoticonEmoticon